When a ball goes onto the red lever the lever slowly moves down then gets stuck until a second red ball lands on it which stops the mechanism from working. Done my best to fiddle around but the lever just won’t balance properly. Means the whole thing doesn’t work if only the blue lever works properly.
Hi Chris,
Sorry about that. This appears to be a somewhat rare problem that happened during production. Take off the long connector on the back of the board and look in the holes on each end. I bet you’ll find that one of the holes has extra plastic inside it. Either use a knife to cut it out or shove a pen into it to push it out of the way.
Edit: See my post below for a more thorough description of what to do if this happens to you.
Hope that helps!
Paul
I have the same problem. Red level will not go down when a ball hits it.
I have tried it in all combinations by swapping each piece… the lever, the top piece and the connector… all the red pieces work when moved to the blue side, and the blue pieces do not work when moved to the red side.
It appears to have something to do with the red/right side…
I have checked the connector pieces for plastic in the holes (there is none, and in any case they both work on the blue side and neither work on the red side.) I have looked for the same (extra plastic) in the holes of the board on the right side. No joy.
(I also noticed that the greed pieces hit the connector if placed in the specific spots near the bottom where the connector passes by the slot on the board. Sometimes when in these positions the ball gets stuck because the green piece won’t dump all the way.)
Any help would be appreciated!
I had the same problem (red lever getting stuck), and when I disassembled the right side mechanism I found no plastic in the holes. But after reassembling the mechanism, the problem seems to have gone away. I did flip the connecting rod since it seemed to be “bowed” in the opposite direction as the left side. Perhaps that did the trick. Or maybe there was plastic in the hole but disassembling the parts caused the plastic to fall out.
1 Like
I have the same problem as well. And there is nothing in the connector holes. This looks like it would be a fantastic tool for my middle school students, but if the device is fickle which it appears to be - it will never work. Please advise ASAP.
Thanks,
Tanya
Thanks for the response. I’ve disassembled it multiple times, tried all pieces in various configurations on the “bad” side, flipped the connector, etc. No go… sometimes it’s better… will work (slowly, levering down) a couple times, then stopping, etc.
As Tanya187 said, I’ll need it more reliable if I’m going to use it in class.
That was exactly my experience. Working fine now. No plastic in hole but started working after fiddling and reassembling.
Working now but not sure there was any excess plastic just fiddled around some more and it started working.
I think I figured it out!
You can see my inept video at https://www.youtube.com/watch?v=ygKkyHA5B5M , but:
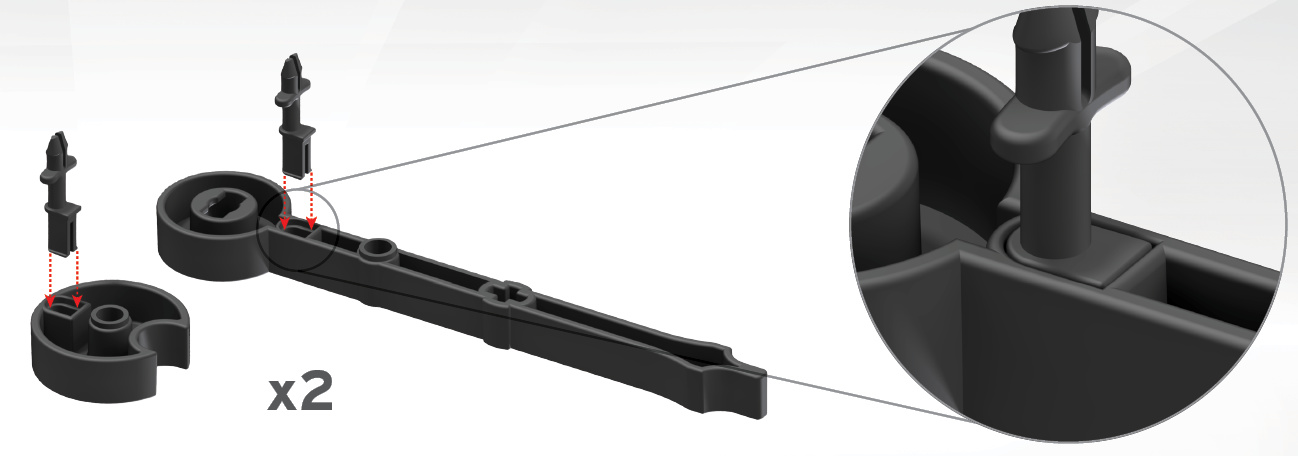
The pins that you put in the disks at the top and the switches at the bottom are very slightly D-shaped. BUT, they’ll go in either way with no trouble!
You need to make sure that the D shape of the pins matches the D shape of the hole you put them in, or they’ll be misaligned, and nothing will flow smoothly.
2 Likes
I had same issue. Reversing the pins did the trick.
I had noticed the D-shaped pins and holes when I first assembled my Turing Tumble. I just double-checked and the pins/holes are properly aligned. So that’s not the problem with my Turing Tumble.
Hi all,
Sorry for the slow reply. There seem to be a few reasons that this can happen. Here they are:
-
As mentioned above, sometimes there’s a little extra plastic in one of the holes in the long connector on the back of the board. Like this:
It was a manufacturing/quality control issue that we’ll hopefully resolve in the next round. That extra plastic can be cut out or pushed aside. -
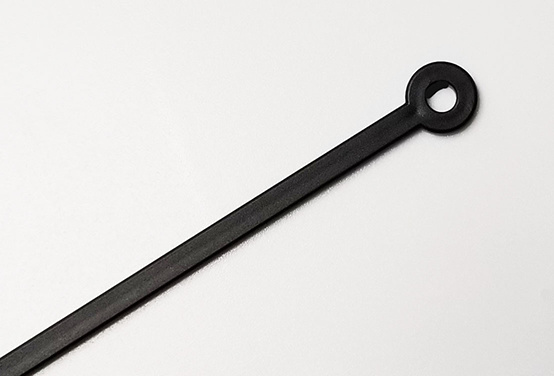
Some people accidentally put the pins in the levers or the ball releasers backwards. If you take out the little black pins, you’ll see there’s a round side and a square side. Make sure you have it oriented correctly when you snap them into the levers/ball releasers so they line up. Otherwise the post will rub against the side of the hole in the board.
-
If you put just the ball releaser on the pin (with no connector attached to the back) and it still doesn’t turn freely, take a look inside the hole of the ball releaser. You might see something that looks like this:
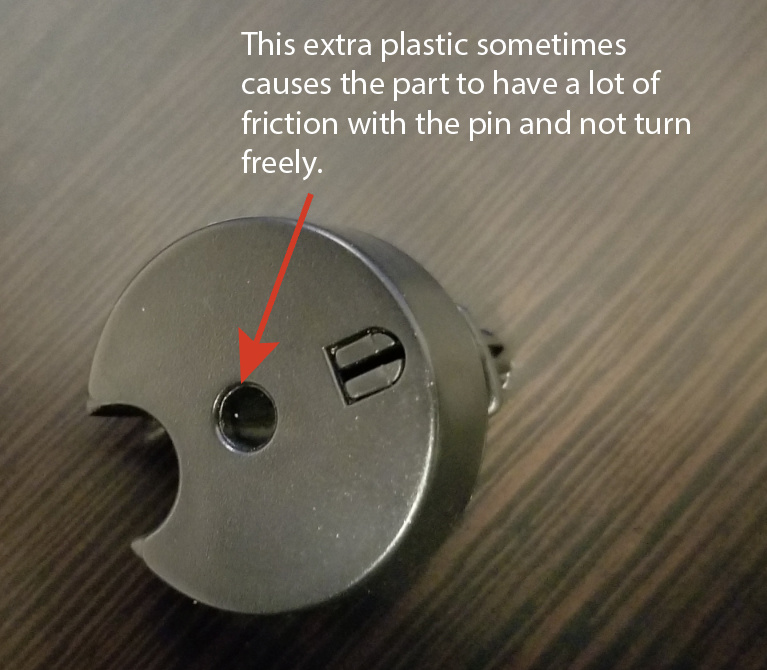
Your ball releasers might have a little too much extra plastic sticking out inside the hole. You can fix this either by taking a knife and cutting the extra plastic out or you can use fine grit sandpaper.
Sorry about that! Rest assured, it’s a rare problem. We’ve opened about 40 of these and set them up, and we’ve only seen this problem once to the point that it required me to clear out the hole.
If you give these things a shot and they don’t work, don’t hesitate to shoot us an email at hello@turingtumble.com and we’ll send you whatever new parts you need.
1 Like
G’day Guys,
I had the same problem. I had the pins in the right way and no plastic in the holes. However it turns out I had the pins a little proud of being flush with the back of the switch lever and the ball release cam. Once they were pressed flush the problem was no more.
Hope that helps.
Cheers - Mark
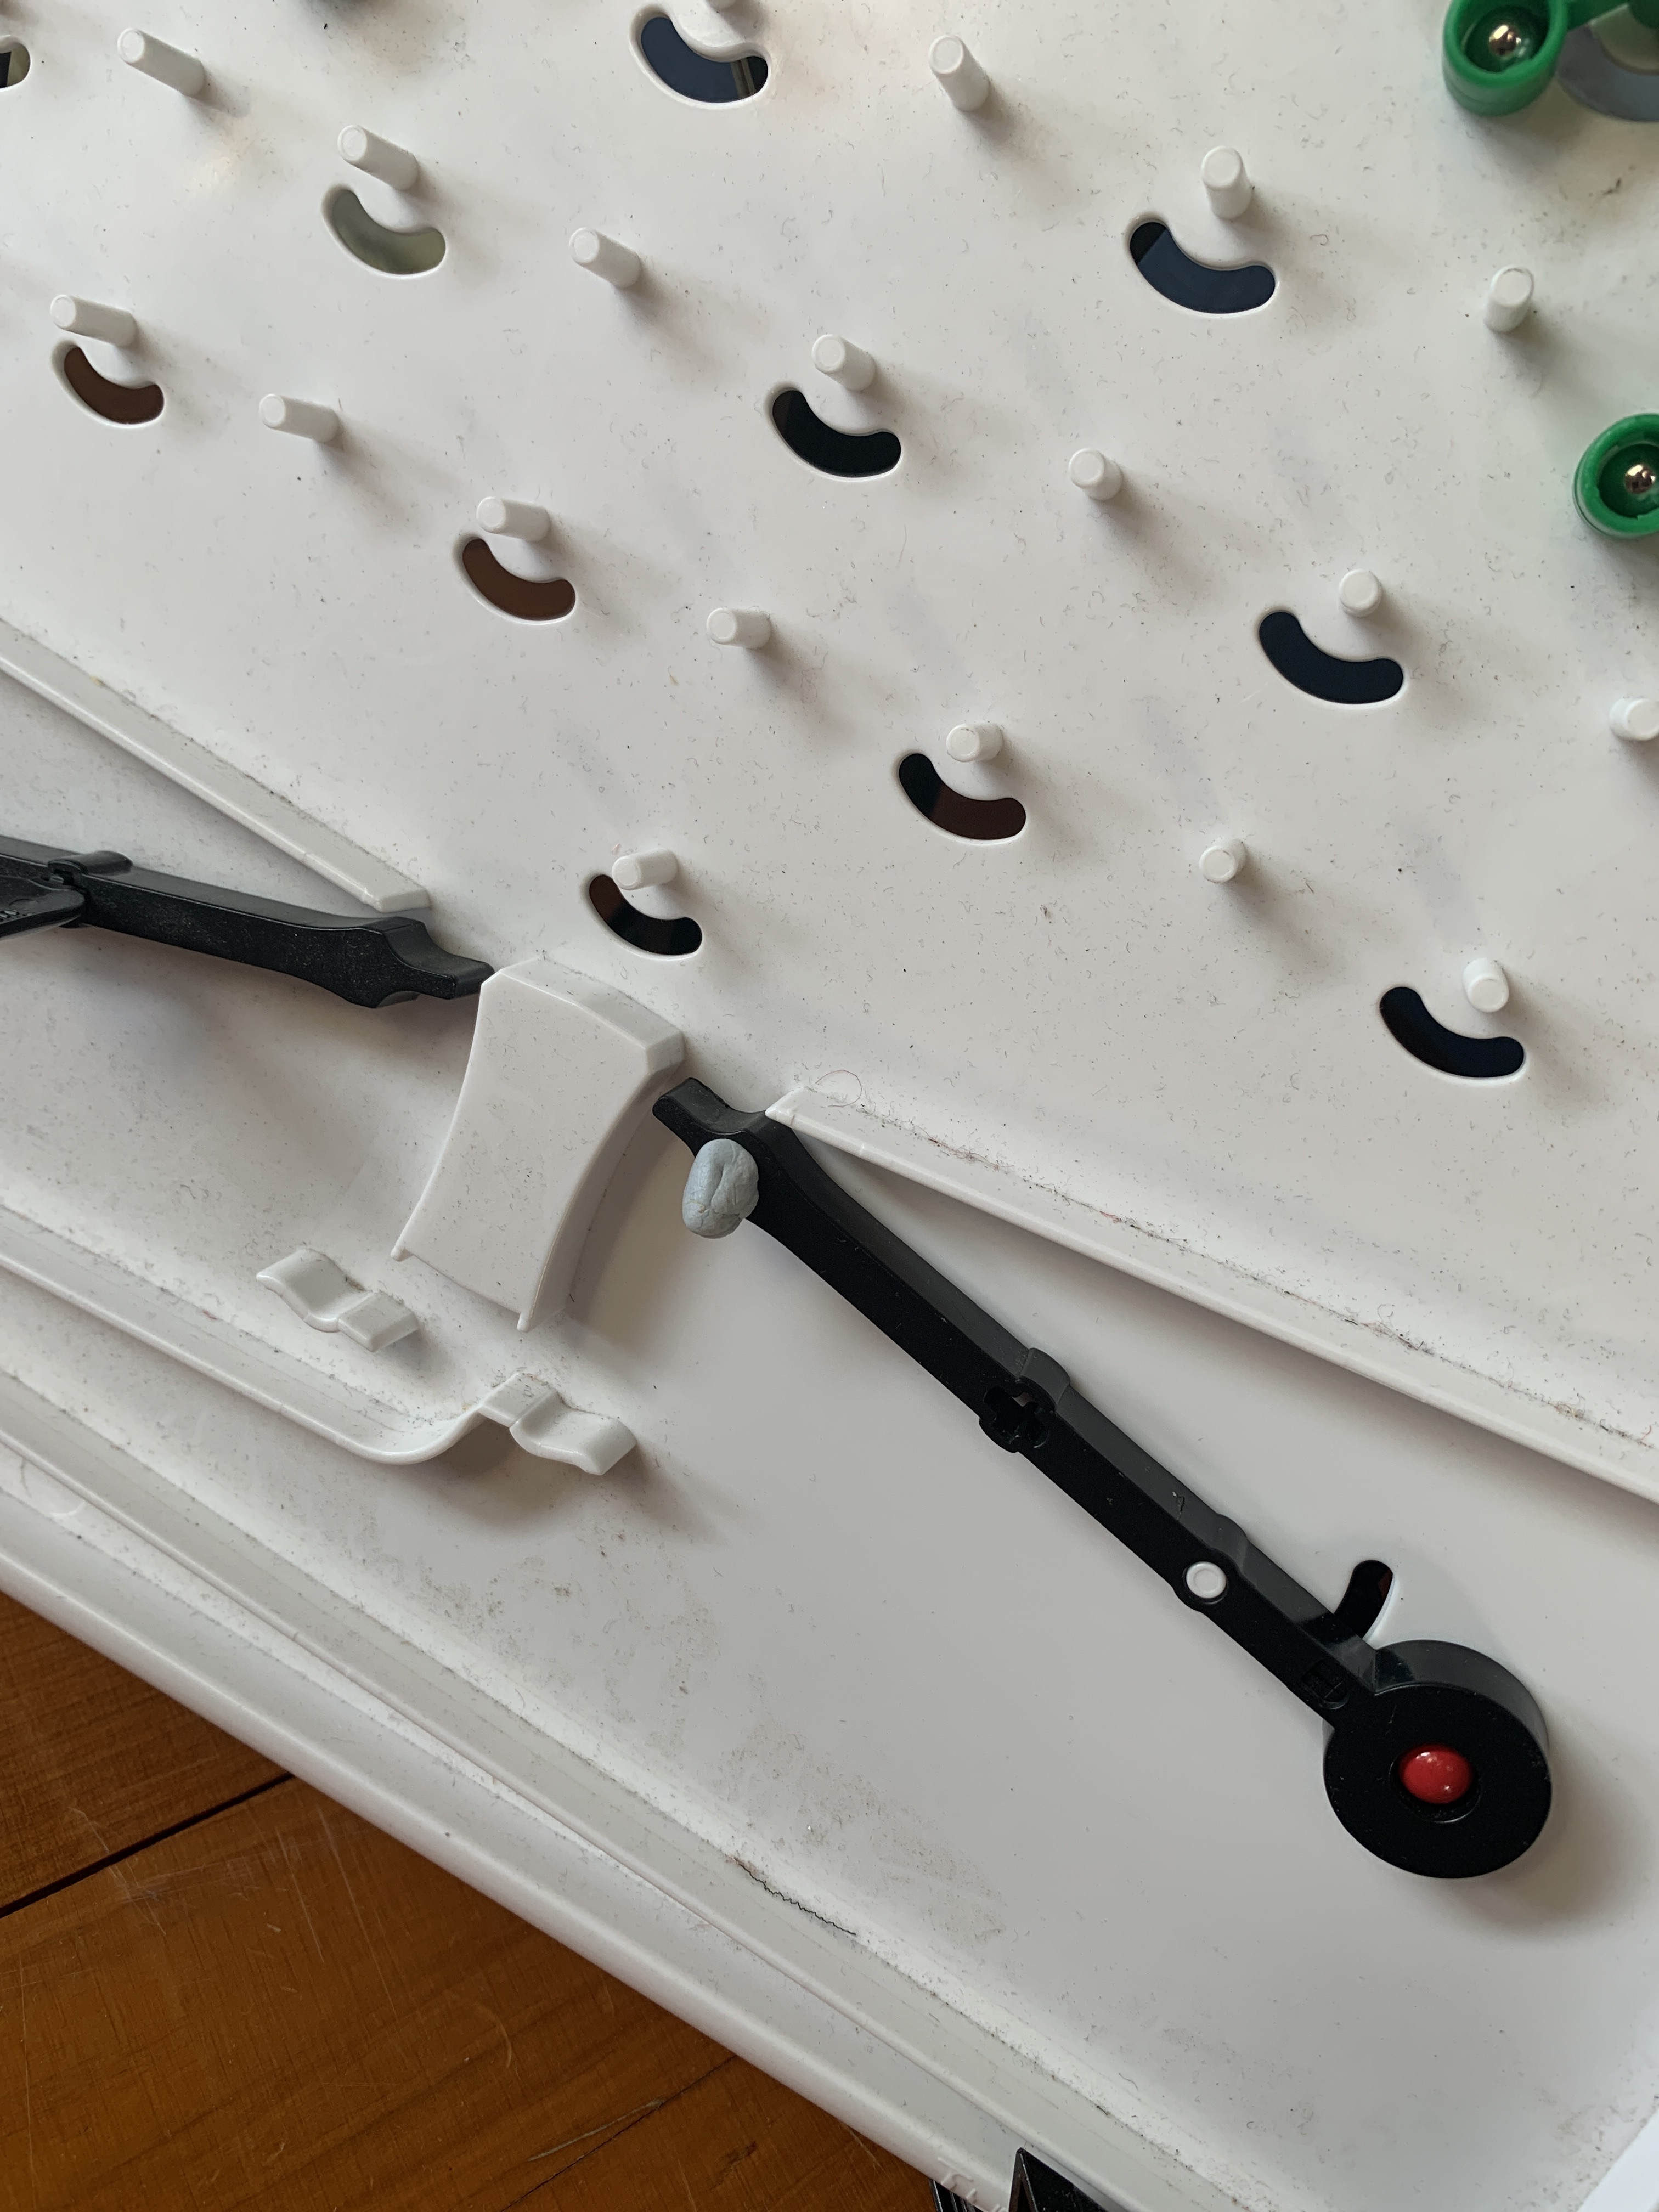
Hi, I found a small amount of Blu tack (or similar) adds a fraction more weight to help the levering process.
I have the same issue, with the right (red) ball releaser getting stuck and not turning freely. It causes the red balls to not be heavy enough to push down the right lever.
It’s not an excess plastic issue or a pin orientation issue as I’ve checked, and furthermore, when I reverse the releasers, they both work perfectly on the left (blue) side and incorrectly on the right side, which means it must be a board issue. I can’t seem to find a reason for it (no obvious defects or excess plastic pieces), but I’m guessing that the right board peg is causing too much friction for the releaser.
Any help would be greatly appreciated.
Jordan, it sounds like the slot in the board has to be widened. Have you tried some fine grit sandpaper on a toothpick, or maybe an emery board or fingernail file? You shouldn’t have to remove a lot of material.
Hi,
Tested all the above by swapping out changing checking etc. narrowed it down that one lever is not right. This is the third one I’ve put together. Other two no issue.
Did that change doing the puzzles ? Did you still get the right outcome to the puzzle even when you had to add something to the red side ?
No, it doesnt change anything, it just allows the lever to operate freely.
In my case, none of Paul’s suggestions worked, and I was going to resort to blu tack. But then I discovered that the pin in the right level wasn’t pushed in hard enough, so it wasn’t quite flush. Now both levers work perfectly.